Articulated Dust Collector Arm
Page 4: Post Block Assembly
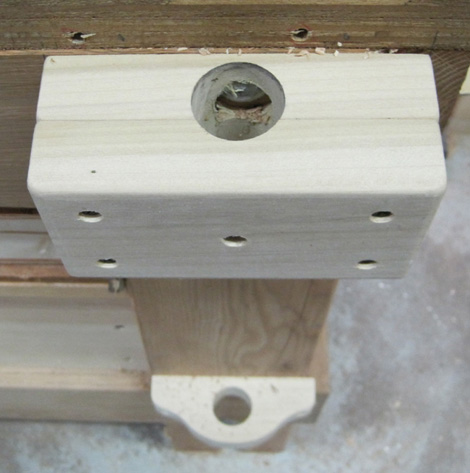
Next we'll construct the top block that will be used to both hold the assembly in place and allow it to be height adjustable. See photos for a better look at what we'll be doing. (Note: In my block, you'll see a hole in the back of the block where it's attached to the lathe stand. This was to go over the head of a carriage bolt that is part of the stand itself that was in my way and has nothing to do with this project.
(fig. 6)
We'll first take those 2 pieces of 6" 2x4 stock, put their faces together and screw them to each other using 4 of the wood or drywall screws from the parts list. One screw in each corner making a 6x4x4 (approx) block. Using a forstner (or other suitable) bit that is just barely larger than the diameter of your pipe, bore a hole slightly behind the seam between the two pieces in the center of the block. (See fig. 6 above)
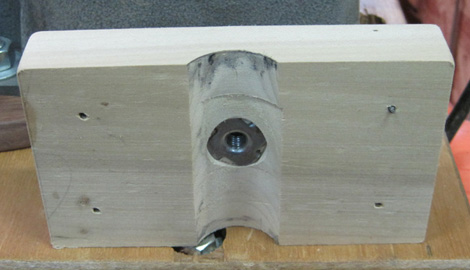
Unscrew the block, then bore a hole through the center of the face of one of the blocks of the correct size to accommodate the shaft of your T-Nut. Counter bore a recess in the back of the block to allow the back of the T-Nut to sit slightly shy of the interior of the bore hole so as to not obstruct the pipe that will be sandwiched between the block halves. (see fig. 7)
(fig. 7)
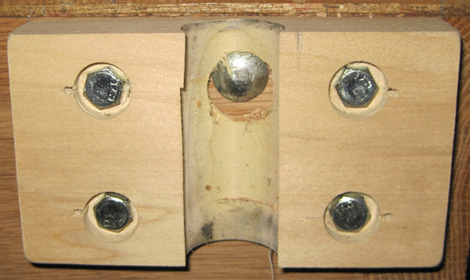
Screw the back block to your lathe stand somewhere near the top of the stand but out of the way of any part of the lathe's headstock or turning area. (I used lag bolts but wood or drywall screws would work just fine. (Again, please ignore the hole in the vertical bore as it's only to allow me to mount the block over a carriage bolt on my stand and is not part of this project.)
(fig. 8)
*** Reminder *** I'm mounting this on a wooden lathe stand. If you're using a cast iron or another type of stand that doesn't allow you to bolt directly to it, we'll explore some alternatives at the end. The block assembly will still be used.
Screw the front block back on to the backer. (See fig. 6 above.)
The lower guide is fashioned from the remaining piece of 2x4 stock. This will have the same hole bored through it as the top block assembly and will be mounted to your lathe stand a foot or two lower than the top block to stabilize the arm assembly. Make sure to line it up exactly with the hole in the top block so the pipe and arm assembly rise and lower smoothly. I shaped mine like so to allow full width to support the post yet not need longer screws to mount it to the lathe stand leg.

(fig. 9)
Now you'll need a knob to tighten the post in position. Hardware stores sell knobs just for this purpose, just make sure it fits your T-nut threads. Another of our 1/4-20 bolts will work also but that will require a wrench to tighten/ loosen. I opted for a more "woodwork-y" DIY knob. We'll get to that next, OR, you can skip ahead to the Inlet Section if you're going for the afore mentioned alternative knobs.